World Generation Breakdown
A large part of Dance of Death v0.6.136 was the addition of world generation. Although the world is little more than a large island at the moment, the results are rather satisfying, even considering that the current method of generating terrain is purely based on elevation. After experimenting with a number of techniques, I settled on this simple formula: 1) Generate Fractal Perlin Noise, 2) Multiply noise by a radial gradient, and 3) Apply terrain and water line. Here is the breakdown:
You can click on any of the images to view an interactive demo, and click again on the demo to generate a new map. The images were all generated randomly, so they do not correspond to a progression of the same maps (while Flash’s Perlin noise generator can be seeded, its random function cannot). Source code is available from Google Code, where you can grab it directly from SVN.
Step 1: Generate Perlin Noise
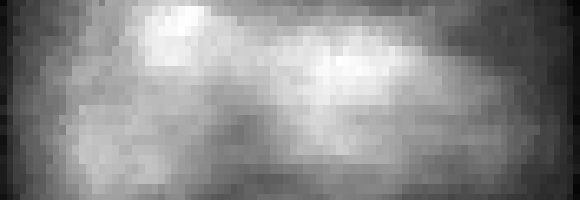
Generate a Fractal Grayscale Perlin Noise with an x-frequency of half the width, a y-frequency of half the height, and 8 octaves. For more loose islands, or for larger maps, you can drop the frequency to 1/4th of the width and height or lower, to fit your purposes. You can normalize the noise from 0-255 if you like, though normalizing now will become redundant later on. This is what we have so far:
 Grayscale Fractal Perlin Noise, normalized for contrast. Click to view demo.
If we apply the terrain to the tiles at this point, we’ll end up with something like this (jump ahead for the terrain application method):

Step 2: Generate Rolling Particle Mask
To get the island to be biased towards the center and avoid touching the edges, a straightforward solution is to multiply its values by a radial gradient mask ranging from 1 near the center, to 0 near the edges. A plain radial gradient might do the trick, since the Perlin noise already provides a healthy amount of randomness. However, I went with a modified version of the Rolling Particle algorithm to get some additional roughness. The basic algorithm goes something like this:
- Start with a blank map, all 0s.
- Pick a random starting spot for the particle.
- Increment the value on the map by 1 where the particle is located.
- Move the particle to a random adjacent position whose value is less than or equal to the current position (imagine the particle rolling downhill).
- Repeat the last 2 steps as long as the particle is alive.
- Repeat for a large number of particles.
A particle life of 50, with 3000 particles works well for this map size (which is 88×32, by the way), experiment to get values that work for you. If we normalize, we get this:
 Basic Rolling Particle algorithm, 3000 iterations, particle life 50. Click to view demo.
While the algorithm produces inherently center-biased maps, multiplying this across the noise results in islands that are too boxy. To round out the results more, instead of picking a random starting point for particles, let’s ensure that they land closer to the center:

To absolutely ensure that the islands will not reach the edges, I’ve also multiplied the outermost tiles by 0.75, and the second outermost tiles by 0.88. These tiles already have some of the lowest values of the map, and softening or “blurring” them this way ensures the final map does not touch the edges.
Step 3: Apply Terrain
Once the base noise map and the rolling particle mask have been generated, multiply the noise values times the (mask/255). Dividing by 255 ensures that the mask values will range from 0 to 1 rather than the normalized 0 to 255. This produces the following result:
 Combined maps. Click to view demo.
We’re done with the heightmap generation. Now onto determining the water line and assigning terrain.
I spent some time fussing with linear regression and other estimators to accurately place a water line, but, at the end, directly sampling the values of the map turned out to be the fastest (to program and execute), and most accurate solution. To determine the water line for the default 60% water used in this world generator, step through the map and throw all of the values into an array. Sort this array numerically. The value indexed at (array.length – 1)*0.6 marks your water line. Everything below it is water, everything above is land.
Now that the waterline is set, I pass that value into each tile’s setTypeByElevation() function, which sets the tile type according to its elevation, as follows:
If below the water line:
- If above waterline-40: shallow water.
- Else: deep water.
If above the water line:
- If below waterline+15, coast/beach.
- If between waterline+15 and waterline+35: plains.
- If above 255-25: mountain.
- If between 255-50 and 255-25: hills.
- Else: forest.
Producing this:
 Final result. Click to view demo.
Grab the source code from Google Code, or directly from SVN. Feel free to tweak any of the values and modify the algorithms as long as you adhere to the GNU General Public License v3 and provide attribution and all that. Enjoy!
You just quit IRC before I managed to type in my comment about the perspective on your world maps. 😛
I think it’s because of the . char that the water seems to be higher than the beach and plains. Have you considered using different chars, maybe ” for plains and = for water (like in Adom)? Not sure if that would work for beach, though.
I think you should at least try something else, as it looks bit weird at the moment, to me at least. But do as you wish, just my suggestion.
That’s all. 😉
Thank you very much for publishing this. It is an inspiring read!
Great article! I was looking at the code and had a problem – in Screen.as, line 33
>> ascii = new Ascii(1, 1);
where/what is the Ascii class?
I don’t see it imported or declared in the screen package.
Hi Nate. The Ascii class is defined in the FLA. It’s the one item in the FLA’s library, also named “Ascii”.
The Ascii class is instantiated with (1, 1) as its width and height since it extends BitmapData, and the BitmapData constructor requires a width and height. However, since it is being brought in from the library, the width and height of the library PNG are used instead, and the (1, 1) parameters are ignored.
Usually, when you come across a BitmapData that is being instantiated as (1, 1), you can bet it comes from the library, since it is unlikely that the code calls for a 1-pixel BitmapData! More generally, if you can’t find a class definition in the source code, take a look at the FLA’s library next, since Flash makes no distinction between explicitly defined classes and those in the library.
I’ve gone ahead and committed comments to SVN to clear that up, thanks for pointing that out!
Thanks Ebyan! – I was just working in FlashDevelop and I didn’t see the .fla file in the bin directory.
[…] of finding a dungeon entrance in the highest peak of the mountains. Ebyan has blogged about the world map generation routine, a worthy read for developers and Roguelike enthusiasts. All the maps I’ve seen look quite […]
[…] I’m sure you all know of games like Dwarf Fortress – massive, procedural generated wilderness and land. Something like this, taken from this very useful article. […]
I’m not a fan of worldgen based on perlin noise but this actually looks really nice.
Thanks, Trystan. I plan on expanding and tweaking the algorithm quite a bit to build larger worlds as I pick Dance of Death back up in the coming months.
I think the largest problem you run across with Perlin-noise-based terrain generators is that they tend to look too blobby and rounded off, as if blurred. Luckily, ActionScript’s built-in Perlin noise generator is pretty robust and allows you to tweak the frequency on both x and y (or how “zoomed-in” the noise is), and the octaves (how subdivided or detailed it is) to reach a nice balance of jaggedness and roundedness, as you see here.
I will right away snatch your rss feed as I can’t find your email subscription hyperlink or e-newsletter service. Do you’ve any? Kindly let me understand so that I may just subscribe. Thanks.
[…] I found a great post about world generation, which can be found here. […]
Huge thanks for the method. i didn’t used any of your code directly though, just looked up edge implementation, and within 2 hour timespan were able to write my own iteration.
Only difference is that i used simplex noise rather than perlin.
Results are stellar to look at
http://screencast.com/t/GpnxcvkKE
http://screencast.com/t/DTwWCcxS
Many thanks :3
Nice to hear you found a use for the rolling particle noise algorithm, smoke_fumus. Can you tell me more about the project to which those screenshots belong?
@Ebyan Alvarez-Buylla
Right now it’s a multitude of projects, but algorithm itself will come in handy many times later down the road.
Great article!
This was invaluable to get me started on my island generator.
Thanks a lot, and keep up the good work.